
Getting Started in Compound Direct: The guide to a smooth setup

Compounding pharmacists are busy, too busy. Compound Direct removes the endless paperwork, batch worksheets, and risk assessment forms, saving you time and effort while keeping compounding smooth and organized.
This blog provides an overview of the six basic steps to get started in Compound Direct. It’s designed to help you begin each step with confidence and navigate the software. From adding ingredients and creating formulations to preparing your first compound, dispensing, and signing off, each step is clearly introduced so you’ll know where to start.
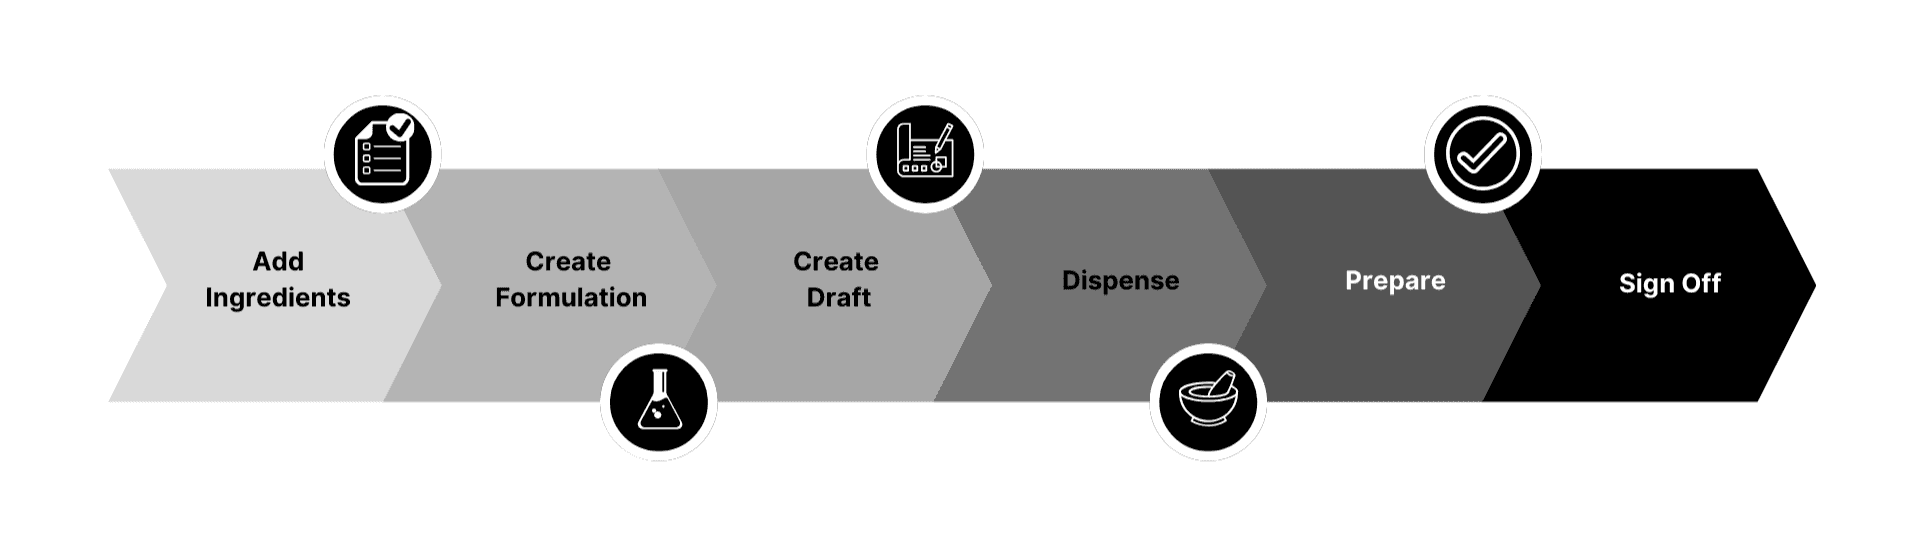
By the end, you’ll be ready to confidently complete your first compound in Compound Direct.
Step 1: Add Ingredients
An ingredient must be added to the system before it can be used in a compounding formula. To get started, add one active (e.g., Minoxidil), one excipient, (e.g., Propylene glycol), and a base (e.g., Ethanol) so you’re ready to create your first compound.
Go to the ‘Settings’ page, then select ‘Ingredients’ . Click on the ‘Create Ingredient’ button.
Enter the name of the ingredient, choose its role in the formula, and select the appropriate unit of measure.
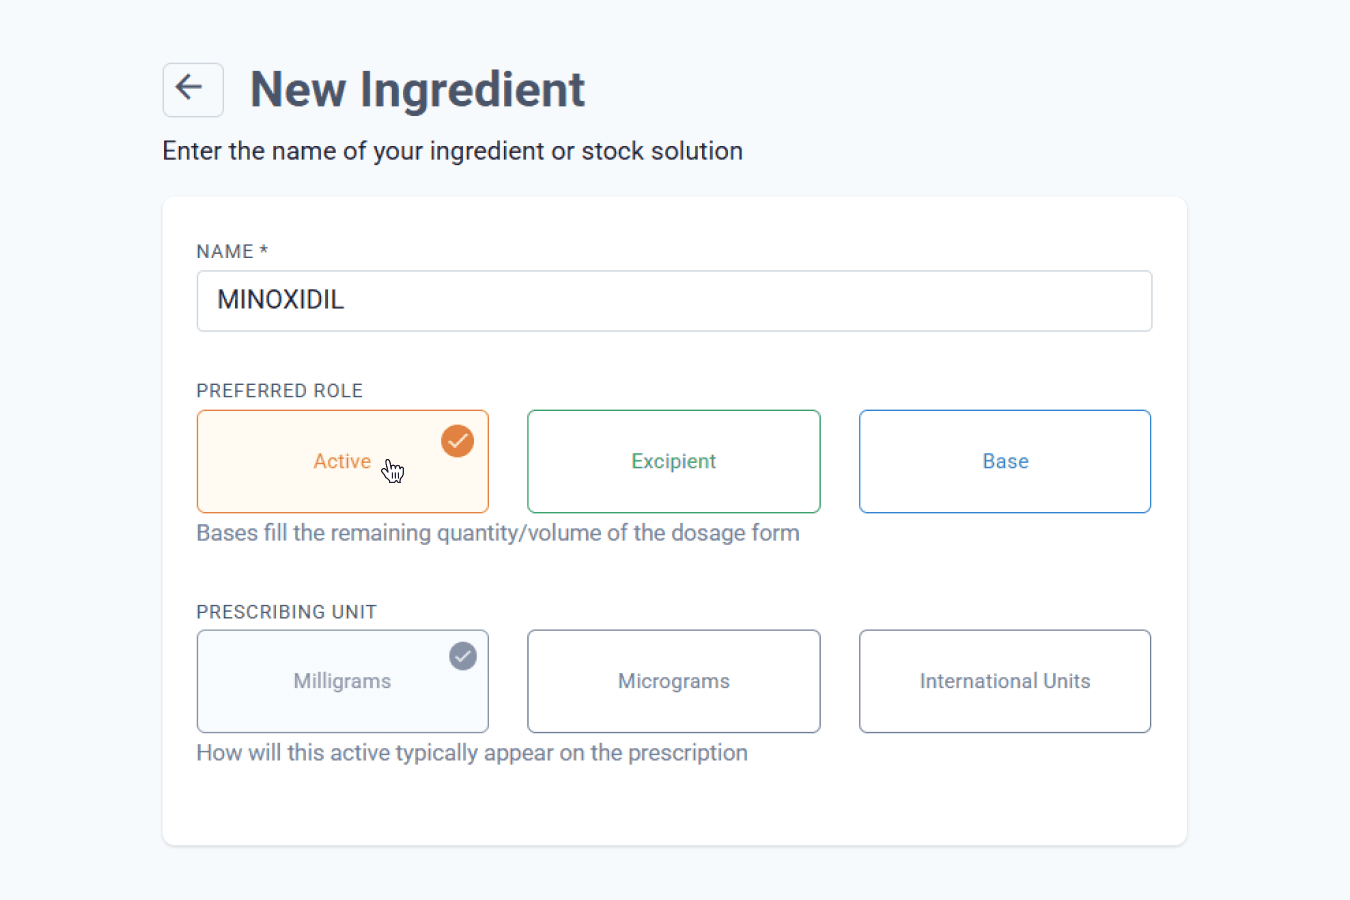
From the ingredients page
From this point forward, have your batch details ready, as you’ll need to enter information like the lot number and expiry date. For Medisca ingredients, you have the option to import batch information by entering the batch number and clicking the import button.
For actives, it is essential to enter the correct adjustment factors, as Compound Direct uses them to ensure the prescribed dose accounts for inactive components such as salts, loss on drying, potency, or excipients and fillers in commercial medicines. For ingredients used in capsule formulations, ensure the packing statistics are properly set up.
Follow the prompts and repeat the process until all ingredients have been added.
Step 2: Create a formulation
Creating a new formulation lets you define ingredients, set defaults, and establish all the parameters needed to accurately prepare a compound. Alternatively, you can skip this step and create a draft instead; the main difference is that a draft doesn’t create a master formulation.
Go to the ‘Settings’ page, then select ‘Formulation’. Click on the ‘Create Formulation’ button.
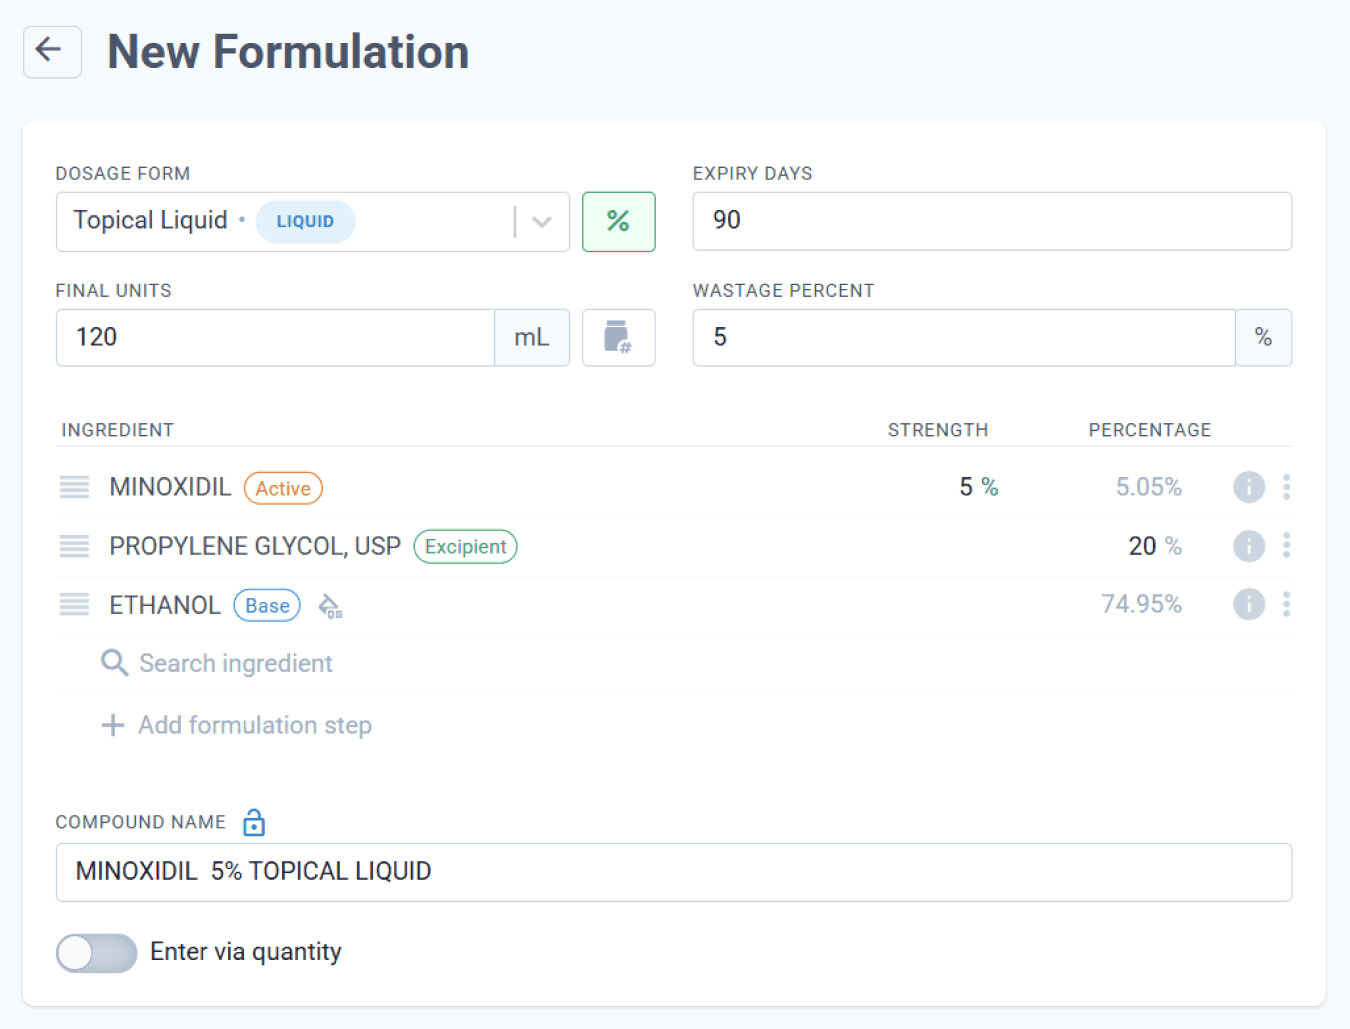
From the formulations page
Enter all necessary information for the new formulation, including the dosage form, expiry day, final units, wastage percentage, ingredients, patient instructions. You may also place the drug schedule, labels, collections, and a reference code.
You can adjust the roles of your ingredients as needed. For example, if you want to use Ethanol as an excipient, click the three-dot icon and select ‘Use as Excipient’. Make sure each ingredient’s role is correctly assigned, especially bases, since Compound Direct will set bases as QS (filling the remaining volume).
Once everything is set, review the details to ensure accuracy, and click ‘Create’. Finally, the pharmacist must Sign Off the formulation before it can be used in compounding.
Step 3: Create draft
The Drafts page is where a pharmacist or technician can also enter prescription details, similar to creating a formulation, except a draft does not create a master formulation. Drafts can be attached to an order and later be signed off by a pharmacist once confirmed by the patient. Since we already have a formulation, it can be easily accessed from the Drafts page.
To create a draft, go to the Settings page and select Draft, then click ‘Create Draft’. Find the formulation or batch stock preparation in the system.
Use the search bar to find and select the name of your compound.
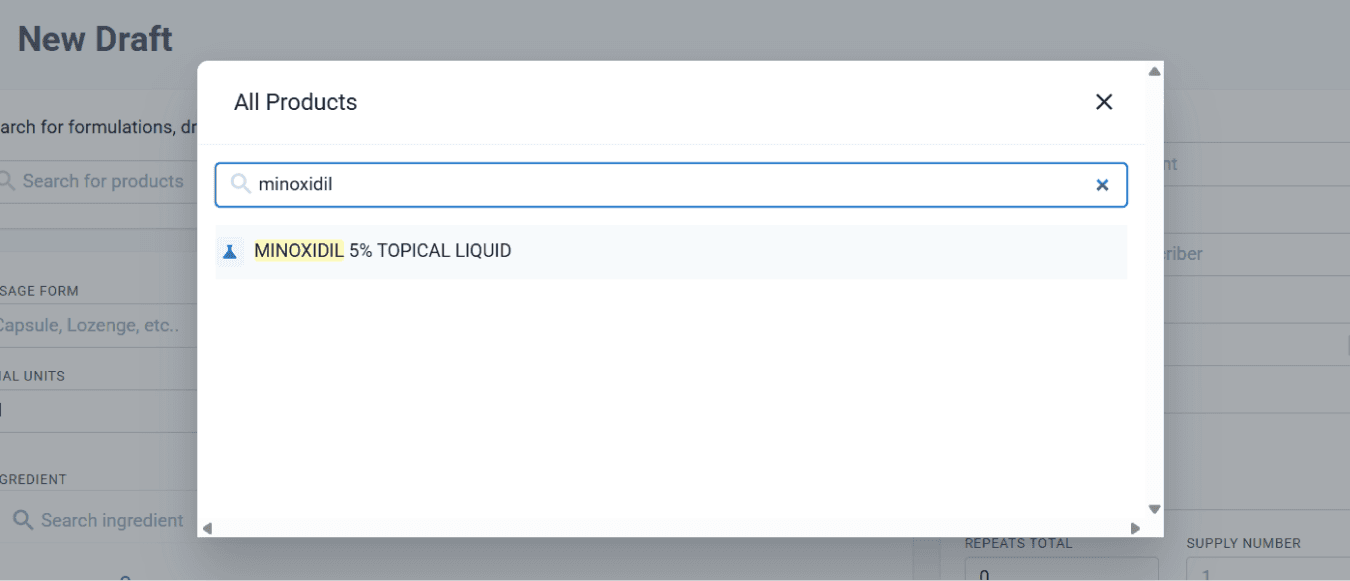
From the drafts page
You can input all necessary information once your formulation or batch stock is selected. Begin by editing the dosage form, expiry, final units, and wastage, and split products into multiple containers if needed, none of these changes will affect the master formulation.
Next, update ingredient details, select pricing, and enter prescription particulars. Be sure to upload any relevant documents and add notes to keep your draft organized, then click ‘Create’ when you’re finished.
Step 4: Dispensing
Before you can compound, we need to 'Dispense' this Draft. This signals that it is now an official pharmacy record and it is ready to start compounding.
Whilst you are viewing the Draft you created in Step 3, click the 'Dispense' button in the draft menu. This will convert the Draft into a Dispensed Script.
Step 5: Compounding
When you open a dispensed script, you’ll see the pharmacist overview.
To begin compounding, select ‘View Preparation’, then click ‘Begin Preparation’. This will take you to the first ingredient to scan and weigh.
Scan the ingredient using a barcode scanner, your mobile/tablet camera, or enter the lot number manually if scanning isn’t available.
Weigh the ingredient and confirm the measurement. The display may look slightly different depending on whether your balances are integrated. Continue scanning and weighing each ingredient until all have been completed and the compound is finished.
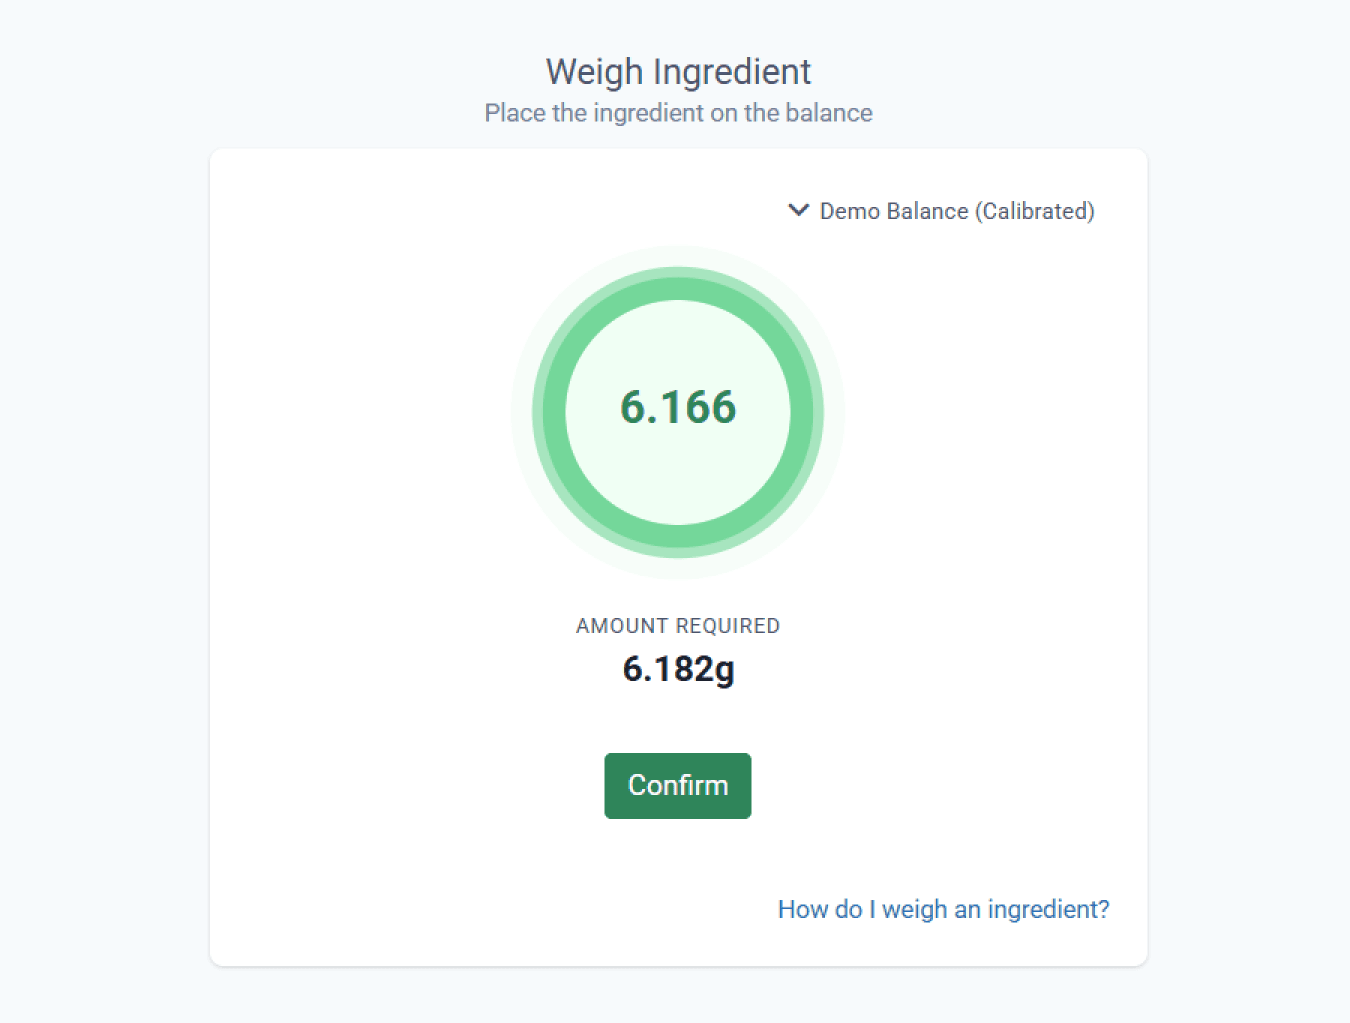
From the dispensed page
Complete this process until all ingredients have been weighed and all formulation steps are finished. Once compounding is complete, you will be redirected to the preparation page.
To return to the dispensed record, click the back arrow button.
Step 6: Sign off
As a pharmacist, review all details of the dispensed script to ensure it meets the required standards and regulations. Check each ingredient carefully and confirm that the recorded weights are accurate.
Once you are satisfied with the compound, select ‘Sign Off’ from the Dispensing record to complete the process.
Conclusion
By following these six steps, you’ve seen how Compound Direct streamlines compounding into a smoother, faster, and more organized process. From adding ingredients and creating formulations to dispensing, preparing, and signing off, each stage is designed to reduce paperwork, improve accuracy, and ensure compliance with regulations.
You’ve got the basics down, but the real impact comes from setting things up the right way from the start. How you build your ingredients and formulations can save you from headaches later and keep your workflow running smoothly. Continue reading in Starting strong: Building Ingredients and Formulations to learn how to set a solid foundation for your workspace.
As you become more comfortable, explore advanced workflows through our recommended resources:
Our user guides provide detailed explanations of every feature, including those introduced during training.
Our blogs provide in-depth discussions on specific topics, offering practical insights to help you build the most efficient compounding workflow.
With the right foundation and resources, you’ll be well on your way to mastering Compound Direct and achieving a faster, more reliable compounding workflow.
All names and medical data shown in software screenshots are fictional and for demonstration purposes only. These figures represent fictional persons; any resemblance to real individuals is purely coincidental. Use of existing fictional names is for illustrative purposes and does not imply affiliation or endorsement.